4 CSS Tips For Every SharePoint Developer
CSS is really powerful, but in order to be really successful with it, you have to understand and have knowledge of the various tools at your disposal. I wanted to take this opportunity to touch on some of the ones that are not as readily used, but are just as powerful nonetheless.
The :not Selector
The :not(selector) is really powerful, but I rarely see it used. Let’s walk through how this works and then I’ll demonstrate with a real example how you might apply this to your CSS.
What does it do: The :not(selector) does as the name implies, it matches every element that is not the specified element/selector.
So for example, if you had some html structured as follows:

And you wanted to style all <li> elements that did not contain the class highlight, you would write your CSS as follows:

The logic above will style all items BUT the one with the highlight class. This can be applied in so many different ways. Remember that the bit inside the bracket is a selector. So we could also do something like this:

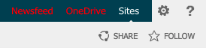
Applying this to SharePoint, let’s say we wanted to style one of the Suite Bar links differently than the others. We could try:

Which would in effect give us:
This is a really powerful selector and I encourage you to give it a try!
Psuedo Elements
Pseudo elements is another one of my favourites. I use this quite often and it simplifies my HTML in a number of different ways. One thing to note is that we have both Psuedo Classes and Pseudo Elements, the one I’ll cover in this post are the Pseudo Elements ::before and ::after.
A really common use case for this is appending additional content before or after an already existing piece of html.
What does it do: The official definition from MDN is as follows: “Just like pseudo-classes, pseudo-elements are added to selectors but instead of describing a special state, they allow you to style certain parts of a element.”
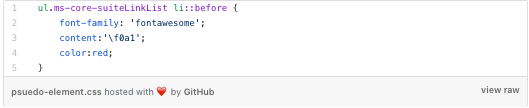
So let’s imagine we use the example of the Suite Bar links above. What if we wanted to prefix each list item with an icon? Pseudo Elements to the rescue!
With the following bit of code:
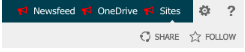
You could accomplish this:
This is just one example, there are several psuedo-elements and pseudo-classes, give them all a try and see what’s possible without adding any additional HTML to your page.
Attribute Selectors
Attribute selectors are another one of those tools in your toolbox that I feel are often overlooked. I find myself sometimes struggling to come up with a way to solve a tricky CSS problem that an attribute selector would handle straight away.
What does it do: attribute selectors are used to select elements whose attribute value begins with a specified value.
Let’s use a slightly different example for this one. Imagine we have some HTML structured as follows:

If in the above example, given that this unordered list may have 3 or more items, if you wanted to affect the middle link in some way, separately from the other 2, that would be difficult to do. Since you can’t guarantee the number of items, using pseudo-classes may or may not be possible.
Instead, we could do something like this:

n the above CSS, I’ve leveraged the text attribute on the HTML element to style this particular item differently than the rest. This is a really simple example, imagine what you could do with some of others:
- a[href]
- select all anchor tags that have an href attribute
- a[target=”_blank”]
- select all anchor tags where the target attribute is equal to _blank
- [title~=”flower”]
- select all elements where the title attribute contains the word flower
- [class^=”top”]
- select all elements where the class attribute value starts with top
The above is referenced from w3schools and you can see examples of many more by clicking here!
Broken Images
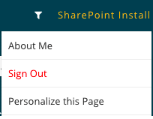
This is a really cool one I just discovered that I thought I’d share! Traditionally, when an image fails to load in a browser, we’re presented with something that looks like this:
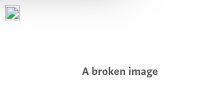
The above isn’t great, it doesn’t tell us much about what url the image attempted to load from and it doesn’t present the user with any additional information. However, we could apply something like this:
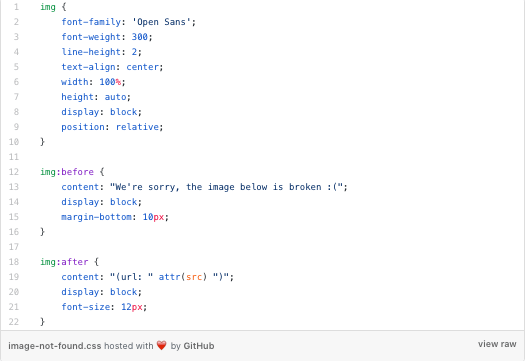
Which should now render the following:

How cool is that?!
So that’s a wrap for now, but I’ve got plenty more where those came from. Let me know if you enjoyed this post and I can follow up with some more CSS tips!

It’s Time To Transform
Let us show you how much easier your work life can be with Bonzai Intranet on your team.